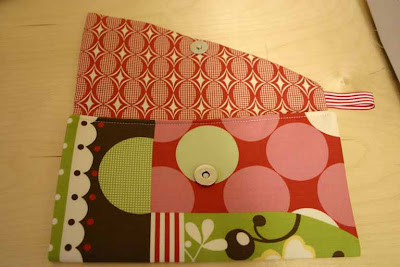
Fabric used in this pattern:
We used Momo Freebird for the outside and inside fabric (mid weight cotton).
Free pdf pattern available to download by clicking here or under the Free Travel Wallet link to the right. The pattern pieces are actual size so you need to print them normal size on your printer. They fit on four A4 sheets so you only need to tape them together and cut out.
You will also need:
Sew in interfacing 25cmx40cm
Iron on interfacing 25cmx40cm
Bag clasp clip 14mm
Instructions:
1.Cut pattern pieces making sure you use the right side of the template against the right side of your fabric and interfacing (as shown in photo below).

2.Attach iron on interfacing to fabric you are using on the inside of your wallet.
Tip: Place fabric onto large interfacing piece and iron on before using your template to cut around.
3.Pin sew-in interfacing to outside fabric and attach by sewing as close to the edge as possible.
4.If you want to embellish the front of your wallet do so now.


6.With right sides of your two pieces together pin together.
7.If adding a ribbon loop - add the ribbon now.
8.Sew with the sew-in interfacing side up so you can avoid stitches. Sew as close to the side as possible making sure you leave the turning point marked open. Back stitch at the start and end.
9.Turn your wallet the right way out by pushing the fabric through the turning point. Then press flat.
10.Stitch the edge below the female clasp which closes the open turning point.
Tip: Stitch neatly on front patterned side as this is the side you will see.
11.Press the folds (shown as dotted lines on your template).
Tip: Match up your clips and press those folds – it covers up earlier mistakes if your clips are a little bit out.

14.Finished – Give as a gift, sell at a craft fair or go travel! 


This is lovely - I am dreaming Freebird at the moment!
ReplyDelete@Flying Blind...
ReplyDeleteThank you!
Thank you, i like this wallet !
ReplyDeleteThis wallet is so lovely! Thank you very much for sharing it! I have a brazilian craft blog, I would like to ask if I could translate your tutorial to portuguese and publish it on my blog, giving all credits to your website. If you want, please visit me at academiacraft.com . I would love if you visit me! I am sorry if my english is not as good as should be. Thank you again, and congratulations for your wonderful projects.
ReplyDeleteHi Liana, Thank you for your kind comments. We would love to be shown on your lovely blog, so yes you have our permission to translate the pattern and link back to us. Thanks again for your interest :)
ReplyDelete